Showing posts with label *barware. Show all posts

Sunday, May 24, 2015

:: time saving juicing tip ::

Cut once, press once. Instead of cutting in half 50:50, cutting 90:10 such that the 10% is mostly shell, and the 90% displays the beginning of the citrus segments and thus most of the juice bounty.


This does not seem to work as well with limes on this juicer (shell is too small and tough), but for lemons and oranges, it reduces the pressing time and effort in half. Grapefruits are just too large to even attempt this maneuver. We used to do a very similar thing at Russell House Tavern that involved making an X with two cuts on the side of the citrus; however, the citrus had a tendency to roll off of our press when attempted on this juicer. When I posted this on Facebook, there was concern from one bartender that it put too much stress on the machine; I countered that there was very little difference between a half lemon and 90% of a lemon in strength (just increase in resistance time/distance); it seemed that there was more stress when juicing 90% of a lime due to the shell integrity though. Another was concerned with the efficiency of the technique, and for lemons and oranges, there was about the same amount of pulp and spent pulp in the shell afterwards; for limes, the shell collapsed inward making it harder to assess. Bartender Ciaran Wiese tacked on the pointer, "Make a shallow cut to the open end of the lemon, it saves the press from ripping the citrus."

Saturday, January 25, 2014

:: arctic chill ice ball maker review ::

A month or two ago, I was contacted by Rizzi at Arctic Chill to review their muddler. Since I already have way too many muddlers between my own purchases and swag at various events, I offered the suggestion that I review their ice ball maker instead. I was curious what their product could offer for I was a bit frustrated with my current ice ball maker, the Museum of Modern Art (MoMA) ice tray set (the pink device in the photos below) that I purchased cerca 2009 or 2010. One problem with it is that its hard plastic does not bend so it is hard to eject the ice ball; prying it out with a bar spoon or running how water on the outside to loosen things up seems to work. The hard plastic also makes me worry that it will shatter when separating the halves. The other problem with the MoMA one is due to the inherent nature of water freezing into ice -- namely that ice expands 10% from the water volume during freezing. This expansion leads to the top half of the tray lifting up and forming a ridge of ice around the equator of each ball. This ice has to be trimmed away through percussion with the back of the spoon or with hot water from a faucet. I definitely wanted to see if technology had improved.
Some time after that, she took me up on the suggestion and sent me a four pack for review purposes. Arctic Chill's product is made from BPA-free silicone so it seemed like that would solve the hard plastic issue for mold separation and ball ejection that I experience with MoMA's. But how would it work with water expansion during freezing and how easy would it be to free the ice ball from the mold? To answer this, I made a pair of ice balls using both the MoMA and the Arctic Chill molds. While MoMA requires the bottom tray to be filled up and the top to be lowered over it until all air is expressed, the Arctic Chill ones can be filled from the top hole (submersion in a bowl of water would work too). No leakage was noted during filling of the Arctic Chill. Possibly the Arctic Chill ball's water fill could be calibrated to allow for some expansion during freezing. The MoMA method makes this partial fill a bit more challenging but not impossible to try this out. One commenter to the post suggested "plac[ing] a weight, like an ice pack, on the top prior to freezing" to reduce the lifting up aspect of the MoMA molds, although the only place for the expansion to occur is out the small hole at the top.
After freezing, the MoMA separated more on one side which caused one of the two balls to have a crater on top. The separation also formed a thick ridge that needed a bit of effort to clean up on both balls; it was still evident after a bit of chipping (hard to make out in the last photo due to color contrast, but it is the 1/8-1/4 inch ridge that runs from 11 to 5 o'clock on the left ice ball). When put in a drink, the remnants of the ridge do go away over time. One of the two Arctic Chill balls separated more than the other; the less separated one seemed to have bled the excess out the top instead. Both Arctic Chill ice balls were easy to clean up since there was only a thin ridge at the mold half intersection; however, a nipple from the mold's fill hole remained though. As for removing the balls, the MoMA ones still had the problems associated with hard plastic and required a short time under the hot water tap. The Arctic Chill ones came free with only a minimal degree of effort; they were slightly adhered to the mold but did not require heat or tools to free them.
Overall, the Arctic Chill ball molds were quite nice, and I experienced little frustration with them. They did produce a more attractive and less labor intensive 2 1/2 inch ice sphere than my old set. I do not know how they compare to say Tovolo's model, but I am guessing that they are pretty comparable. On Amazon, a set of four ice ball molds sells for $24.95. Indeed, they will definitely be replacing my old set.

Thursday, November 24, 2011

:: camano coffee mill review ::

A few weeks ago, Andrea was looking through Martha Stewart's Living magazine and pointed out a coffee mill in the holiday gift recommendation section. I replied that I had been looking on eBay for a vintage one to grind coffee at work, but I never pulled the trigger for I was unsure of how well they would work. However, I was getting frustrated with my coffee I ground at the store losing much of its glorious terroir flavors and aromas over the first week or two. Therefore, I started researching what modern mechanical options there were that would do as good of a job as the electric burr grinder attached to our Capresso coffee maker at home. After reading a few articles including a discussion on Chowhound, my research took me back to the same one that Martha Stewart had recommended -- the Red Rooster Trading Company's Camano Coffee Mill!
Some of the selling points were that each grinder is hand-built in the United States with the wood being walnut sourced from Amish woodsmen. Reviews praised how quiet and well constructed it was; moreover, at $60, it was a lot less than a good electric one. Most importantly, the grind was adjustable!
By simply lifting the washer, the threaded wheel at the bottom of the spring could be turned; turning it clockwise changed the spring tension and made the grind finer, and turning it counterclockwise made it coarser.
In tuning the grind today, I could make it rather coarse (left) or rather fine (right) with the desired medium in the middle (note that there is some cross-contamination of the grinds in each pile). I did not take them to the extremes so even finer for espresso grind seems quite doable. From the resultant coffee we made, it seemed like a success!

Friday, November 11, 2011

:: science of cocktails ::

Last night I attended a lecture at Harvard University hosted by Dave Arnold, faculty of the French Culinary Institute and one of the bloggers for Cooking Issues, and Harold McGee, a scientist and author of some seminal books about the chemistry of food and cooking. I had previously heard Dave speak at Tales of the Cocktail's "Science of Shaking" seminar back in 2009 and he did cover some of that material last night. I was familiar Harold McGee through his writing, particularly On Food & Cooking, and I discussed some of his work in my notes about eggs post.

Dave started the talk by focusing on juice clarification and carbonation. The process of clarifying fruit juices via agar agar gelling followed by centrifugation (other compounds and processes work well too) removes a lot of the color and cloudiness; with that removal is a loss of flavor including bitterness. For carbonation, clarification of fruit juices is necessary to avoid horrible foaming problems. In a similar rationale, the particulates in citrus juice are necessary to give the desired texture to citrus drinks during shaking. As I will mention in a bit, these particulates can trap air, and removing the particulates can control the gaseous components in the liquid better.

The other process for clarification that was discussed does not require a centrifuge. While Dave encouraged bartenders to own centrifuges, namely a 3 liter scale one with 4 swinging buckets, they can run $8-10,000 new but can be had for $1-2,000 used (or $500-1000 used and broken if you are a fixer-upper type). Instead, there are wine fining technologies that use ionic charges to pick up particulates and precipitate them through gravity alone. Chitosan was one of his preferred compounds; it is made of chitin from the shells of shrimp or other crustaceans and contains multiple positive charges to bind things. In conjunction with Kieselsol which has multiple negative charges, it will strip out these bitter components and particulates in fruit juices without the need of a centrifuge. Dave did say that he was searching for vegetarian options to recommend. Both of these compounds can be bought at wine making shops.

With the topic of carbonating drinks, Dave warned bartenders to drop the alcohol concentration in drinks for two reasons. One is that people generally drink carbonated beverages faster and the other is that carbonation can increase the perception of alcohol which can be unpleasant to some. For carbonation systems, Dave recommended getting a tank and regulator system set to 40 psi; the whole rig can be bought for around $150. The other option is using chargers which can get expensive at 75 cents per tube (versus $15 to fill a large tank) and pricey if multiple carbonation cycles are required. The first part of carbonation should be the removal of air since air is the enemy of carbonation as it encourages foaming. Options are squeezing out (if using a plastic soda bottle system), pulling a vacuum, or adding a blanket of CO2. Multiple rounds of carbonation (upwards of 3-4) will help. In between rounds, the number of nucleation sites for foaming will be depleted. Clarification of fruit juices will help remove many of these nucleation sites as mentioned above. The four points to improve carbonation were: colder, clarification, air removal, multiple rounds of carbonation.

Since carbon dioxide is more soluble in alcohol than in water, more CO2 is needed. Why? Because the tongue cannot detect air in solution but only gases leaving the liquid. For the same feeling on the tongue, there needs to be more gas pressure.

Harold McGee took over as Dave set off to make drinks for the room. Harold spoke about alcohol and the biological purposes for microbes to make it -- namely to poison off competitors from eating their food sources. Most bacteria cannot take more than a percent or two of alcohol save for acetobacter (see the notes about shrubs post). Next, Harold moved on to the strange chemical qualities of ethanol as compared to water and how much stranger things get when the two are mixed. The first demonstration was mixing 250 mL of water with 250 mL of ethanol. Both started at room temperature of 21.4°C, but after mixing, the volumes were less than the expected 500 mL (closer to 490 mL) and warmer than expected at 27.9°C. While diluting liquor warms it up, Harold assured the room that the cooling effect of ice would easily make this change negligible. In a chart of the various difference of the density, boiling and melting points, and the like of water and ethanol, Harold focused on two important differences: vapor pressure and surface tension. Ethanol has a higher vapor pressure meaning that it wants to leave as a gas more, and water has a higher surface tension meaning it is attracted more to other water molecules (great molecular stickiness). With these differences along with boiling point, distillation can be achieved.

When water and alcohol are mixed, there are other changes besides volume and temperature. First, the mixture becomes much more viscous than either of the starting components such that it gives a greater mouthfeel. Relating to the volume differences, the minimum occurs at 80% alcohol due to how the alcohol interacts with the water molecules. The hydrophobic end of ethanol molecules will interact and fill the holes in between water molecules and will increase the efficiency of molecular packing. Things got a bit technical with nuclear magnetic resonance data showing the different ways ethanol and water can interact (3E-H2O and E-6H2O), and Harold commented that some people believe that these difference affect vodka flavor. The impurities would effect which interactions are favored and can affect mouthfeel and flavor.

In terms of aroma, alcohol molecules can cluster aroma molecules via ethanol's hydrophobic end. This process isolates these molecules and protects them from our senses. In diluting the spirits, the ethanol concentration drops and these aroma molecules are less happy in aqueous solution and volatize so we can detect them.

Dave took over with the science of shaking versus stirring. For a detailed explanation, I will direct you to one of his articles. The main points are:
• 99% of chilling power of ice comes from the melting process; initial temperature of the ice matters less.
• There is no cooling without dilution, and no dilution without cooling (assuming the ice is in the drink).
• The more water that is trapped in crenulations in wet ice, the more dilution there will be without cooling. "Crap ice" from a machine will work just as well if the trapped liquid water is stripped away.
• Ethanol helps to drop the freezing point of the solution so sub-0°C/32°F temperatures are possible.
• Ice size in shaking does not matter as all equilibrates in terms of dilution and chilling in around 12 seconds. All styles fall with in a 1-2° range.
• More important than shaking technique is straining technique. The amount of ice shards that pass through will effect temperature and dilution.
• Stirring is less efficient so ice size matters.
• To get consistency in stirred drinks, the time, size of ice, rate of stirring matter greatly.
• Stirring produces warmer but less diluted drinks than shaking.
• While liquid nitrogen can cool down drinks, it is harder to use on a small scale. If used, adding it to the glass first will allow better mixing. Adding it after, and the liquid nitrogen will remain on the surface more.
• Liquid nitrogen is great for chilling glassware though (see my 3 part series on the effect of glass temperature on the drink for why cold glassware is important).
There was a demonstration on the effect of red hot pokers to make Colonial era drinks using a high proof spirit and a low proof one like beer, cider, or wine (in addition to sugar and perhaps a citrus element and salt). Instead of giving great details, please see these two New York Times articles about the red hot poker and recipes (including the stove top version). Additional notes are as follows:
• The basic premise behind the process was taking one molecule (sugar) without an aroma and converting it into hundreds or thousands of molecules, some of which have aromas.
• As things are heated, they get more bitter and burnt so more sugar is needed to compensate.
• Remember to lower the alcohol concentration for heat increases our detection of alcohol.
• Hot drinks are better served in a wide bowl like a tea cup to dissipate the alcohol aroma better. Irish Coffee mugs are too narrow and concentrate stinging alcohol aromas.
The last part was about emulsifiers and stabilizers to make oil-based simple syrups. Instead of fat washing which can capture a subset of the flavor components, this process captures them all as well as including the rich mouthfeel of the fats and oils. Gum arabic helps to emulsify oils and xanthan gum prevents these oil droplets from coalescing. The combination can be found in Tic Gums products like their 301S product. Using these in conjunction with a stick blender will allow oils to be put into syrups and buttered rums from having the fat float to the surface. As a demonstration, Dave and Harold made a drink using a pumpkin seed oil syrup; for every 1 1/2 oz, there was 1 oz of 1:1 simple syrup and 1/2 oz oil, and this added a glorious flavor and thickness to the drink.

Dave ended the talk by giving a big hint for drink creators. If a drink tastes flat, try adding a pinch of salt before you sink it in frustration.

Wednesday, April 13, 2011

:: effects of glass thickness on drink temperature ::

On my last post on chilling glassware before use, Ed of the Wordsmithing Pantagruel blog focused in on one of my statements about glass thickness. I only used one type of cocktail glass for the first two sets of experiments and made caveats that glass thickness may effect the warming rates of the drink and the cooling rates of the glass. Ed commented, "You mention that [the] thinner glass will chill more quickly, which is very true but the thinner the glass, the less the initial temp of the glass matters because it will have a relatively lower mass so it takes less time and energy for it to warm up. A thick bottomed DOF [Double Old Fashioned] will take forever to come down to temp in the freezer, but it will keep its contents much colder much longer. There is no free lunch."
To get up to speed on the other experiments, please read:
• Part 1: Effects of Glass Temperature
• Part 2: Kinetics of Glass Cooling
I realized that the thermal effects of the glass on the drink (experiment 1) were worth revisiting using different types of glasses. Therefore, I selected one cocktail glass type that was thinner and and fragile than the Libbey Martini glasses and one type that was thicker and more clunk clunky. Despite weighing the glasses, I have to assume that there is only a percentage of that mass (albeit a large fraction) that is effective in the temperature transfer in the short term and that the thermal contribution in the stem and base were less important. But what about a rocks or Old Fashioned glass? With no stem and often a rather thick base, how would this compare to cocktail glasses? Instead of looking at the rates of chilling of the various glassware, I chose to investigate how each of the glass types behaved on a shaker-chilled drink when the glasses were either room temperature or cooled in the freezer.

Materials:
• 21 oz Vesica Vodka (80 proof)
• 2 Thin Cocktail Glasses
• 2 Thick Cocktail Glasses
• 2 Double Old Fashioned Glasses
• Freezer
• Cobbler Shaker
• Fine Strainer
• OXO Measuring Cup
• Ice from Tovolo Trays from Freezer
• Digital Thermometer with Thermocouple (-58°F to 2372°F, ±0.1°F)
• Timer Application on Droid Phone
• Digital Scale

(l-r: thin cocktail, thick cocktail, double Old Fashioned)

Protocol:
• Measure room temperature and freezer temperature.
• Weigh each of the glasses.
• Chill one glass of each type in freezer until fully chilled (2.5 hours).
• Keep one glass of each type at room temperature.
• Add 3 oz vodka and 4 ice cubes to cobbler shaker. Shake 30 seconds.
• Double strain to remove ice shards.
• Measure temperature every 30 seconds for 5 minutes while gently stirring with temperature probe.
• Glasses removed from freezer 10 seconds before straining.
• Do a round of shaking to measure initial temperature before straining.

Caveats:
• See previous experiments for rationales on shaking a Vodka "Martini." Also read the rationale for only measuring the initial temperature in the shaker (t=0) once on a separate experiment.
• Room, ice, and freezer temperatures will affect results.
• Different drink compositions will change the amount of alcohol, sugar, and other solutes in the drink and may effect temperatures.
• Experiment was only performed once per condition instead of triplicate like the first experiment. The time courses of the replicates did not show significant variation then to warrant the extra spirit and time expenditure.

Data:
• Room Temperature: 67.4°F
• Freezer Temperature: 3.9°F
• Vodka (shaken for 30 seconds) Temperature: 23.7°F
• Glass Weights (for room temperature and freezer conditions):
Thin Glass: RT 112.5 grams, Fr 112.5 grams
Thick Glass: RT 159.1 grams, Fr 166.7 grams
Double OF: RT 375.5 grams, Fr 382.7 grams


Conclusions:
When glasses were not chilled, the thickness or mass of the glasses' material in contact with the drink correlated with the degree of warmth it imparted to the cooled drink. It makes sense that the warmer and thicker the glass, the more it will affect the drink, but by how much and over what time frame? This effect was both instantaneous such as the ~2 degree range (for the 3 glasses) in the drink at 60 seconds to ~5 degree range at 5 minutes. Indeed, the linear parts of the curve have different slopes suggesting that thicker glasses will take much longer to come into equilibrium with the drink.

When the glasses were chilled in the freezer, an interesting situation occurred. For the two thicker glasses, the drink was actually chilled further after shaking. While the drink in the thinnest glass immediately started warming up by the first time point of 30 seconds, the drink in the middle thickness glass dropped to a lower temperature at 30 and 60 seconds, returned to close to the shaken temperature at 90 seconds, and started increasing at the 120 seconds time point. The double Old Fashioned was even more extreme; the temperature of the drink kept dropping until about 150 seconds. Even after the 5 minute time point, the drink from the freezer-chilled double Old Fashioned glass was even colder than it was when first shaken.

This superchilling effect would most likely not be observed in the ice water-chilled glasses for the theoretical temperature of 32°F (experimentally 33.6-33.9°F in the first two experiments) for ice water is warmer than the temperature of the shaken drink (here, 23.7°F). On the other hand, the ice water chilling would still decrease the rates that the drink warmed up from the initial temperature upon shaking. Here, I did not attempt the ice water-chilled condition with the different glass types to keep the experiment as simple as possible; however, in retrospect, they would have been interesting data points.

In summary, the choice of glassware does matter greatly. The obvious take home message is that thinner glasses are better when the only option is unchilled glassware, but when freezer chilled, thinner glasses impart less potent cooling effects. The thicker the glass, the need to chill the glassware before use becomes more grave. What was less obvious was that freezer-chilled glassware can actually help to drop the drink's temperature even further than the temperature in the shaker. The first experiment missed that effect for the Libbey Martini glasses, while not fragile, were not thick enough to observe this negative temperature effect. Lastly, this experiment does not address the extra time it would take to chill a thicker glass with either ice water or freezer storage.

Thursday, April 7, 2011

:: kinetics of glass cooling ::

In a post a week and a half ago, I researched the effects of a cocktail glass' initial temperature on the drink that was poured into it. In that study, I shook a "Vodka Martini," strained it into room temperature, ice water-chilled, and freezer-chilled glassware, and measured how this altered the drink temperature. While unchilled glassware provided the warmest (and thus least desirable) drink, the ice water's and freezer's effect lowered the drink temperature by 1.9°F and 4.4°F, respectively, relative to the unchilled glass. While these numbers will vary by drink composition, glass size and thickness, and other variables, the end result was that the coldest drink would come from the coldest glassware. What did 2 or 4 degrees difference mean? It was like waiting 3 or 5 minutes after the drink was poured to first sip it (less time for warmer rooms). If the point of it as described by the Savoy Hotel's Harry Craddock was, "...to drink a cocktail... quickly, while it's still laughing at you," every moment or degree of chilling wasted was one too many.

In the comments section of that study, Anna of the TwoSheetsInTheWind blog asked about the kinetics of the chilling since I took mine to extremes (glasses were put in the freezer more than 90 minutes in advance and on ice water over 20 minutes in advance). Anna inquired, "When you shorten the time the glass spends in the freezer, how does it compare? At one bar I frequent, they go through a remarkable number of glasses; on a busy night, it is not uncommon to see the dishwasher run, emptied into the freezer, and a glass from that run used within 10 or 15 minutes. What sort of effect does the freezer have versus ice water when you are looking at starting with a hot glass and can only freeze it for 15 minutes?"

When I asked a local bartender about his dish washing machine's cycle, he could not tell me when the sterilization stage fell or how hot glasses were when they came out of the washer. Instead of dealing with glasses at that moment, I started with room temperature glasses as a good starting point.

For me the question was how selecting the right glassware (stored at room temperature) for the recipe I just decided upon would effect either the spontaneity of the process or the end result. Clearly, we cannot fit all or even a significant fraction of our new and vintage glassware in our freezer (unless, of course, we got a much bigger freezer), but how much preparation would it require for ice water and freezer chilling to take its full effect on glassware? Should we be dedicating a portion of the freezer to storing a selection of glassware at all times?
To get up to speed on the other experiments, please read:
• Part 1: Effects of Glass Temperature
• Part 3: Effects of Glass Thickness on Drink Temperature
Materials:
• 2 Libbey Martini Glasses
• Freezer
• Ice from Tovolo Trays from Freezer
• Cold Water from Sink
• Digital Thermometer with Thermocouple (-58°F to 2372°F, ±0.1°F)
• Timer Application on Droid Phone
• Digital Scale

Protocol:
• Measure room temperature.
• Stick thermocouple in freezer, close door, and record the kinetics of chilling when not attached to a glass by taking temperature values every 30 seconds. Stop when temperature stabilizes to acquire freezer temperature.
• Weigh cocktail glass #1.
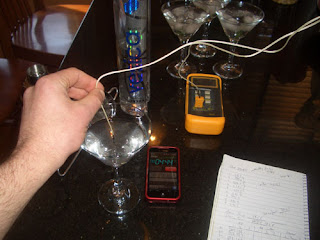
• Tape thermocouple inside the glass to lowest part of the cocktail glass' bowl. Wait until temperature equilibrates.
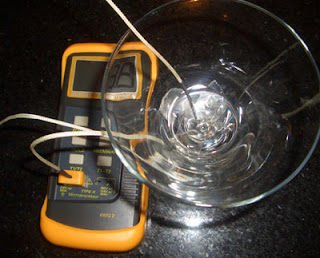
• Place glass in freezer, close door, and record temperature every 30 seconds.
• Weigh cocktail glass #2.
• Tape thermocouple to the outside of the glass to less than an inch up from the bottom of the bowl.
• Add 5 ice cubes and weigh the ice. Quickly add 3 oz cold water and weigh water.
• Record temperature every 30 seconds until temperature stabilizes.

Caveats:
• Different glass sizes and shapes will affect the end result. Here, the 2 glasses are comparable to each other, but not to other glasses.
• Variations in room temperature will affect results.
• Amount of times the freezer door is opened and closed will change the results (will happen in reality, not in this experiment though).
• Amount of air circulation in different freezers may vary and affect chilling rates; also the number of other warm glasses placed in freezer may alter the results.
• My thermometer was never calibrated.
• Experiment was only performed once per condition instead of triplicate like the last experiment.
• The thermocouple could be affected by outside air, instead of reading just the temperature of the glass. No insulation on the airside of the thermocouple was added besides tape. Hence, the glass could seem colder in the freezer and warmer at room temperature.
• Tap water was not pre-chilled with ice.

Data:
• Room temperature: 63.6°F
• Freezer temperature: >5.9°F
• Ice water temperature: 33.9°F

• Weight of glass #1 (freezer): 235.8 grams
• Weight of glass #2 (ice water): 239.2 grams
• Weight of ice: 157.3 grams (5 uncracked Tovolo cubes)
• Weight of water: 86.5 grams

• Data are single runs, not averages:


• Time for ice water glass-chilled to reach coldest point: 330-360 seconds
• Temperature of ice water-chilled glass: 38.8°F
• Difference between glass' coldest point and ice water: 4.9°F (effect of air temperature)

• Time for freezer-chilled glass to reach coldest point: over 25 minutes (>1500 seconds)
• Temperature of freezer chilled glass at end of 25 minutes: 12.5°F
• Difference between glass' coldest point and freezer: 6.6°F (effect of air temperature and incomplete cooling)

Conclusions:
In terms of spontaneity, ice water chilling was fast. At our room temperature and glass type, the full extent of the chilling occurred in 5-6 minutes. In contrast, the freezer's chilling was slow to reach its fullest effect; in fact, I tired of the experiment after 25 minutes of taking measurements ever 30 seconds. The rate of cooling was decreasing, but it was still several degrees away from its potential (at least 6.6°F, if not more due to air temperature effects on the thermocouple). Perhaps another 10 minutes or so was needed putting the range for completion at 35-45 minutes. As a positive note for spontaneity, after around 7 minutes (disregarding air temperature effects on the thermocouple), the freezer chilled glass was as cold as the ice water chilled one once it reached equilibrium. Therefore, at that time point, both techniques were equivalent in merit.

Again, the choice of glassware will effect the chilling kinetics. Moreover, while a freezer will work on the whole glass, the ice water will only work effectively on the glass' bowl and a temperature gradient will be set up in the stem. Of course, in chilling Old Fashioned glasses, the ice water would work on the whole glass including its thick base. While our Libbey glasses are not the thinnest of our collection (not the thickest either), most glasses we own are thinner which would, therefore, help to accelerate both time courses.

As the previous experiment showed, freezer-chilled glassware was the optimal choice; however, as this experiment shows, that peak of perfection is hard to do on the fly or in a high volume establishment in the weeds. The previous experiment showed that ice water chilled glassware was an intermediate choice; here, the peak of this middle ground technique was reasonably fast (under 6 minutes). At home, this would require a small amount of patience. At a high volume bar, it would require a steady line of glasses chilling in advance. Of course, the solution is to go to bars when they are less busy to have the best chance of getting cold glassware and thus cold drinks.

Sunday, March 27, 2011

:: effect of glass temperature ::

While it is always stressed that chilling glassware is an important step in making great drinks, how important is that to the end result? Moreover, some bars will cool their glassware in freezers while others will chill them with melting ice or ice water. While obviously the freezer is more optimal, how does that difference translate into the final drink temperature? To test that, I devised an experiment to address these questions using a Vodka "Martini" as a standard drink.

Materials:
• 30 oz Vesica Vodka (80 proof)
• 9 Libbey Martini Glasses
• Freezer
• Cobbler Shaker
• Fine Strainer
• OXO Measuring Cup
• Ice from Tovolo Trays from Freezer
• Digital Thermometer with Thermocouple (-58°F to 2372°F, ±0.1°F)
• Timer Application on Droid Phone
• Digital Scale

Protocol:
• Measure room temperature and freezer temperature.
• Chill 3 glasses in freezer for over 90 minutes.
• Chill 3 glasses with ice cubes with some water.
• Measure temperature of ice water before use.
• Keep 3 glasses at room temperature.
• Add 3 oz vodka and 4 ice cubes to cobbler shaker. Shake 30 seconds.
• Double strain to remove ice shards.
• Measure temperature every 30 seconds for 5 minutes while gently stirring with temperature probe.
• Ice water dumped 15 seconds before straining. Glasses removed from freezer 15 seconds before straining.
• Do a round of shaking to measure initial temperature before straining.
Caveats:
• Yes, I shook a Vodka "Martini" but it is a quicker technique than stirring and is a consistent method. Moreover, taste and texture of the drink were unimportant here.
• Different glass sizes and shapes will affect the end result. Here, the 9 glasses are comparable to each other, but not to other glasses.
• Ice temperature (from freezer or wet ice) will affect results.
• Room temperature will affect results.
• Different drink compositions will change the amount of alcohol, sugar, and other solutes in the drink and may effect temperatures.
• My thermometer was never calibrated.
• Initial temperature (t=0) was only measured once as a separate experiment. Performing it for each run would have disrupted the experiment. This data point is only there as rough estimate for each trial's initial time point.
• Glasses were not handled or drank from (which would otherwise normally happen).

Data:
• Average Glass Weight: 237.4 grams (range 231.1-244.3 grams)
• Room Temperature: 59.1°F
• Freezer Temperature: 13.1°F
• Ice Water Temperature: 33.6°F
• Vodka (shaken for 30 seconds) Temperature: 24.9°F

• Data presented as average of triplicate runs:
Average Temperature (30-300 seconds):
• Room Temperature Glass: 31.0°F
• Ice Water Chilled Glass: 29.1°F
• Freezer Chilled Glass: 26.6°F

Differences in Average Temperature (30-300 seconds):
• Room Temp - Ice Water: 1.9°F
• Room Temp - Freezer: 4.4°F
• Ice Water - Freezer: 2.5°F

Differences in Temperature at 30 & 60 seconds:
• Room Temp - Ice Water: 1.2 & 1.7°F
• Room Temp - Freezer: 2.7 & 3.8°F
• Ice Water - Freezer: 1.6 & 2.1°F

Conclusions:
Initial temperature of the glassware before straining does effect the temperature of the drink. The freezer-chilled glassware provided the coldest drinking experience but only provided a drink that was 2.5°F colder than an ice water-chilled glass in this experiment. The freezer-chilled and ice water-chilled glassware were better than unchilled glassware by 4.4°F and 1.9°F, respectively, over the time course. The differences, however, were not as great in magnitude when the first sip might be taken (somewhere between 30-60 seconds after straining).

Choice of glassware would matter greatly. In a cocktail glass, the stem and base do not play a large role, whereas in a rocks glass, the thick base would act as a large heat sink. Moreover, freezers will chill the whole glass whereas ice water will mainly chill the cocktail glass' bowl. Future experiments could address these difference such as by measuring the temperature time courses of coupes and rocks glasses as well as different styles of cocktail glasses.

So what does a 1, 2, or 4 degree difference mean to the perception of a drink? Obviously, this will vary by drink composition and some drinks will be only slightly less pleasant to drink warmer whereas others' balance will begin to crumble. Over the 5 minute time course, an unmolested drink changed about 3 degrees in this experiment. Perhaps making the same drink twice, strained 5 minutes apart and sampled simultaneously, would help to answer that.
Be sure to read the other experiments:
• Part 2: Kinetics of Glass Cooling
• Part 3: Effects of Glass Thickness on Drink Temperature

Saturday, June 19, 2010

:: product review: oxo double jigger ::

Oxo Brand's newest addition to their barware line is a double jigger to supplement their 2 ounce Mini Angled Measuring Cup. Why might you care about yet another double jigger on the market? Well, theirs besides being a standard 1 1/2 x 1 ounce double jigger has demarcations on the inside for 1/4, 1/3, 1/2, and 3/4 ounces! Quite handy in that only one jigger is needed to do a wide spectrum of pours. Moreover, it contains the 1/3 and 3/4 ounce marks that their 2 ounce measuring cup sadly lacks. While 1/3 ounce does not seem very useful for most American recipes, the vast majority of European ones use milliliters or centiliters (mL or cL) instead of ounces, and the frequently called for 10 mL or 1 cL measure is pretty identical to 1/3 ounce. One criticism I heard from a local bartender is that he wished one of the ends was 2 ounces since they frequently use their standard 2 x 1 ounce jigger a lot at their bar. Priced at $9 at the Boston Shaker, it was worth purchasing to give it a try. If my review gets a little geeky, keep in mind that I'm a biochemist by day so volumes are very important to my work (and my play).

Looking down at the measurement lines, the 1 and 1 1/2 ounce are standard jigger territory, the 1/2 and 3/4 ounce are sharp lines, and the 1/4 and 1/3 ounce are beveled (or S-shaped) "lines". This last part stressed me since I was unsure of how I was supposed to fill this cup-within-a-cup design -- to the top of the inner cup (so liquid sits on the ledge) or slightly overfill (so liquid just hits the outer cup wall)? I am unsure why OXO chose this style instead of a sharp line except for aesthetic reasons. The aesthetic reason is not in the interior, but on exterior to have a smooth transition from their black plastic gripfast material and the metal.
I wanted to test the accuracy of the OXO jigger in my hands and compare it to other measuring devices, namely the OXO 2 ounce measuring cup and two standard jiggers. The materials I used were:
• OXO Double Jigger
• plastic OXO Mini Angled Measuring Cup
• 1/2 x 1 ounce Double Jigger from Kegworks
• 1/2 x 1 ounce Double Jigger from BarSmarts (part of the kit for taking the class)
• 100 mL graduated cylinder
• 1 funnel
• Tap water (Somerville, MA's finest)
All values are the average of a cumulative 12 pours (i.e.: I did not try to measure each individual pour). I did not test the 1 1/2 or 1 ounce lines as I was more interested in the accuracy of the demarcations inside (and I assumed that they were as accurate as any other quality jigger).

1/4 (0.250) ounce
• Filled to top of inner cup: 0.236 oz (-6.0%)
• Filled to just touching outer cup: 0.283 oz (+13.3%)
1/3 (0.333) ounce
• Filled to top of inner cup: 0.319 oz (-4.2%)
• Filled to just touching outer cup: 0.364 oz (+9.3%)
1/2 (0.500) ounce
• Filled to line: 0.457 oz (-8.6%)
3/4 (0.750) ounce
• Filled to line: 0.708 oz (-5.6%)

1/2 oz on other jiggers:
• OXO 2 oz Cup: 0.488 oz (-2.5%) (* viewed from side)
• KW 1/2x1 oz: 0.497 oz (-0.6%)
• BS 1/2x1 oz: 0.504 oz (+0.8%)

The quick and dirty results are that standard jiggers (filled to the top) are quicker and more accurate in my hands so the all-in-one convenience of the OXO Double Jigger has its set backs. The 1/3 oz jigger is elusive here in the United States although occasionally I have spotted 10 mL jiggers (Boston Shaker had some British ones a few months ago); therefore, this extra measurement line is handy. Moreover, 1/4 oz is only present on the OXO measuring cup or estimated in a larger jigger (i.e.: in a 1/2 oz) or approximated as 2 large-sized barspoons.

The internal line in the plastic OXO measuring cup was easier to be precise since I could view it from the side (I have the clear, not the metal version). Standard laboratory volume measurements are always taken from the side since water forms a U-shape in a vessel as it adheres to the glass or plastic walls. Scientifically, this shape is called the meniscus and it is accurately measured at the bottom point of this U-shape. When I did the experiment looking solely from the top down, I was short by 11.7% for the OXO measuring cup 1/2 oz pour which is consistent with trying to eyeball a clear fluid in the metal OXO Double Jigger.
The cup-within-a-cup design for the 1/4 oz and 1/2 oz demarcations was indeed confusing. They are not as intuitive to use as a regular jigger or a sharp line, and with one methodology, I undershot, and with the other, I overshot.

While these internal measurements in the OXO Double Jigger were not as accurate as regular jiggers, they were close and very handy. More accurate results might be obtained with darker colored liquids (perhaps less tricked in top-down viewing) as well as with increased frequency of use to acclimate to the jigger and compensate for its shortcomings. Overall, not a bad piece of barware, and inaccuracies of 5-10% per measure might not in the end greatly effect the balance of a drink.

Saturday, October 31, 2009

:: ice geeking ::

Preparing drinks can be facilitated by owning the proper tools. While a lot of people have spoken about the shakers, jiggers, and the like, very little has been written about ice tools. Ice plays a critical part in the drink making and enjoying experience, and its shape and size can effect everything from the preparation to the presentation. Here, I will talk about some of my more recent purchases in regards to processing small format ice and I will point you in the right direction if large format ice is your thing.

The ice tapper is the most frequently used tool in my arsenal; it is used to crack ice cubes into smaller pieces. Smaller pieces of ice have a greater surface area and thus cool drinks down quicker (given the same amount of ice). This can be advantageous during stirring and shaking many drinks. An exception to this is egg drinks where you want more froth which is best generated with large cubes; however, I have seen bartenders use a mix of cubes and cracked ice to promote both cooling and frothing. Surprisingly, it does not take a lot of force to break ice (although for more fine crushing, it does). With square cubes (made in Tovolo Perfect Cube silicone ice cube trays), it takes about 3 taps. The trick is not to tap the same side multiple times in a row, but to turn the cube to a new side each time. Each tap sets up cleavage planes that lead to the cube ending up anywhere from 3-12 pieces depending on your force, the tool, and the ice. While harder taps do work well, it does end up scattering ice fragments across your kitchen. In the photo are three of our crackers. The bottom one is a new one we bought at the Boston Shaker and, despite seeming rather light, is rather effective. The middle one is a vintage one we found in an antiques store in Somerville, NJ. Besides the cool Bakelite handle, the heavy ball and spring combination can generate a good amount of ice cracking power with very little hand movement. The top one is another vintage piece, a simple barspoon. Yes, the back side of the barspoon you already own will crack ice quite well. It does not have the springiness in the shaft that the other crackers do, but it will work quite well.

Ice tappers can only do so much. For a glass full of chipped ice for Tiki drinks or Juleps, tappers would become tedious besides the pieces being often larger than desired. One of the more useful tools which spares you the horrible noise of the electric blender is the manual ice crusher. Pictured above is an older Art Deco Ice-O-Mat reproduction I bought on eBay. Metrokane makes a few styles of ice crushers (the Boston Shaker sells one) and there are often vintage (especially wall-mounted) ones in antiques stores. While ours is stylish, it has a low ice capacity (2-3 at a time) and only produces one size of ice. The newer ones can hold more cubes in the hopper and will do two sizes depending on which way you crank the handle (as well as often have a vacuum to attach it to the counter).

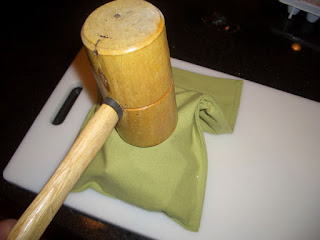
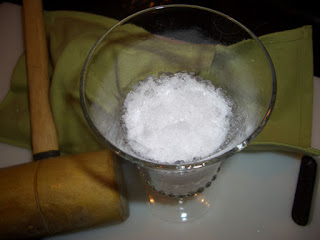
For even finer ice, a very satisfying tool is the Lewis bag. The Lewis bag is nothing but a tough canvas bag that you load the ice into, fold over the opening, and then smash the ice with a mallet or meat tenderizer. The bag pictured above is a hand-stitched one we bought at the Boston Shaker which is rather well made (besides coming in a variety of colors). We also have a canvas bank bag (seen below the ice tapper and Ice-O-Mat above) which works well but is not as thick, well-seamed, or attractive as the handmade ones, but was a lot cheaper and come in a variety of sizes. And for the DiYers out there, follow bartender Josie Packard's lead and sew your own! The one she did for Drink uses thick canvas that is triple-stitched via a sewing machine (according to the bartenders there, it is more likely to give out in the center than through the stitching when being used). For a striking implement, I got a pair of his and hers factory seconds mallets off of eBay. I was tempted by some of the vintage ones but got frustrated with the bidding wars and went with something off of the buy-it-now list. The end result is finely crushed ice (although larger sized pieces will be in the mix depending on how thoroughly you smash away) which was perfect in our Sherry Cobbler.

This list of ice processing tools is by no means complete; for example, I have seen ice crushed via wood muddler in a mixing glass. And there are plenty of ice geeks who want to go even more old school and render large format ice down into the proper size and shapes of their choosing. Drink in Boston, for example, purchases 50 pound ice and uses a variety of shavers (think wood planes for ice), cleavers, and ice picks. The shavers seem to work the best in terms of generating the finest ice without electricity albeit with a bit of time and effort. For some of the best ice picks I have ever seen, go visit Cocktail Kingdom and look at their Japanese ice picks. The rest can be found in various antiques stores (although I have no clue how long John Gertsen of Drink searched for his bar's tools).

Wednesday, September 2, 2009

champerelle

One of the more intriguing bar gadgets that I recently bought was the British-style Bonzer barspoon (available at the Boston Shaker store in Somerville, MA, and online at Cocktail Kingdom). At first glance, it looks like a standard barspoon great for mixing drinks and measuring half teaspoon amounts with the added aesthetic merits and textural sensations of the twisty stem.
But what's that on the right you ask? I have heard vehement arguments over what that flattened end is used for in the field (and specifically in the UK). One camp declares that it is used as a bar muddler and the other argues that it is a drink layering device. Therefore, I decided to test the merits of each claim in my own kitchen.

The first aspect I set out to test was the muddler. For muddling something soft like mint in simple syrup (pictured to the left), the tool worked rather effectively. The only difference between it and my gold standard wooden muddler is the smaller surface area on the spoon's tail end. At the bottom of the mixing glass, this difference just meant a few extra strokes. Moving on to the other end of the spectrum -- the sugar cube -- the spoon's muddler seemed to falter (note: I did not even attempt to crush ice cubes). To derive the force necessary to smash the cube into powder, the spoon felt awkward to hold on to due to its narrow diameter, especially compared to the wooden muddler which fits nicely in the hand. My fingers kept sliding down the shaft, but with enough attempts, the sugar cube eventually gave way. In between these two extremes, I figure that the muddler end would be sufficient for softer items like berries and herbs; however, it would have issues in muddling citrus with the rind like in a Caipirinha or smash. Added force applied on the spoon end should be avoided since the weld holding the spoon bowl to the shaft apparently will give way. So as a muddler, it is adequate for some ingredients and it is certainly handy to have a single tool to do both, although I still prefer my sturdy wooden muddler as my go-to tool (and Dr. Freud would certainly be proud).

The second aspect I tested out was the drink layering. For standard floats, gently pouring on the back side of any barspoon or teaspoon with its edge touching the glass works so the flat end seems excessive for this purpose. However, for making a pousse-café, a multiply layered drink, in a narrow glass, the convex part of the spoon trick is not sufficient. For a recipe to test this functionality out, I opened my copy of Boothby's World Drinks and How to Mix Them and picked the Champerelle.
Champerelle
(1) 1/4 jigger Curaçao
(2) 1/4 jigger Anisette (Pernod)
(3) 1/4 jigger Chartreuse (Green)
(4) 1/4 jigger Cognac (Courvoisier VS)
(5) few drops Bitters (Fee's Whiskey Barrel)
Pour carefully, as numbered, into chilled pousse-café glass, so that ingredients will not mix, and serve with cut straws and ice water chaser.
I must admit that pouring the layers with the Bonzer's flat end was a little tedious but not that difficult to achieve perfection on the first try (my middle transition would look better if my old bottle of Pernod had not yellowed to look similar in color to my Chartreuse). The lower I got the OXO mixing cup, the gentler the pour. Beforehand, I did experiment with starting at the top of the spiraled shaft with some water but this caused drops to fly off before landing at the flattened base. At a height of a few inches, the stream adhered beautifully to the shaft quite well. Keeping the OXO mixing cup touching the shaft and the edge of the flattened base touching the side and slightly above the surface was not that difficult to achieve even with several slow pours.

Overall, I rather like my Bonzer barspoon. It has a great feel in the hand as opposed to a straight, untextured shaft. The muddler is handy in a pinch although it will not be my tool of choice; however, the layerer is quite superior to anything I own especially for depth and precision work. At $13-14, the Bonzer barspoon is more pricey than say my $3 eBay one, but it is a lot more stylish and handy for certain advanced techniques. And oh yeah, it stirs drinks too!

Tuesday, December 2, 2008

:: cocktail bitters and tools ::

The Boston Shaker has apparently set up shop at Grand in Somerville, MA (374 Somerville Ave, Union Square). Adam is rather receptive to the needs of the cocktail community and is always asking me what I would like to see, so shoot him an email through his website with ideas...
I spy Marasca cherries, a lot of Fee's Bitters and other brands, ice crushers, and books in that photo. I heard that he has Angostura Orange but I do not see them above. Will have to check it out soon.